Setup our codebase
What are we going to build
Before starting with actual coding, it’s better to have an overview of what we are building. In our first parts, we will keep the app as basic as possible, while exploring the most important concepts of our stack.
We will build a bookstore application, the data model will look like the chart below:
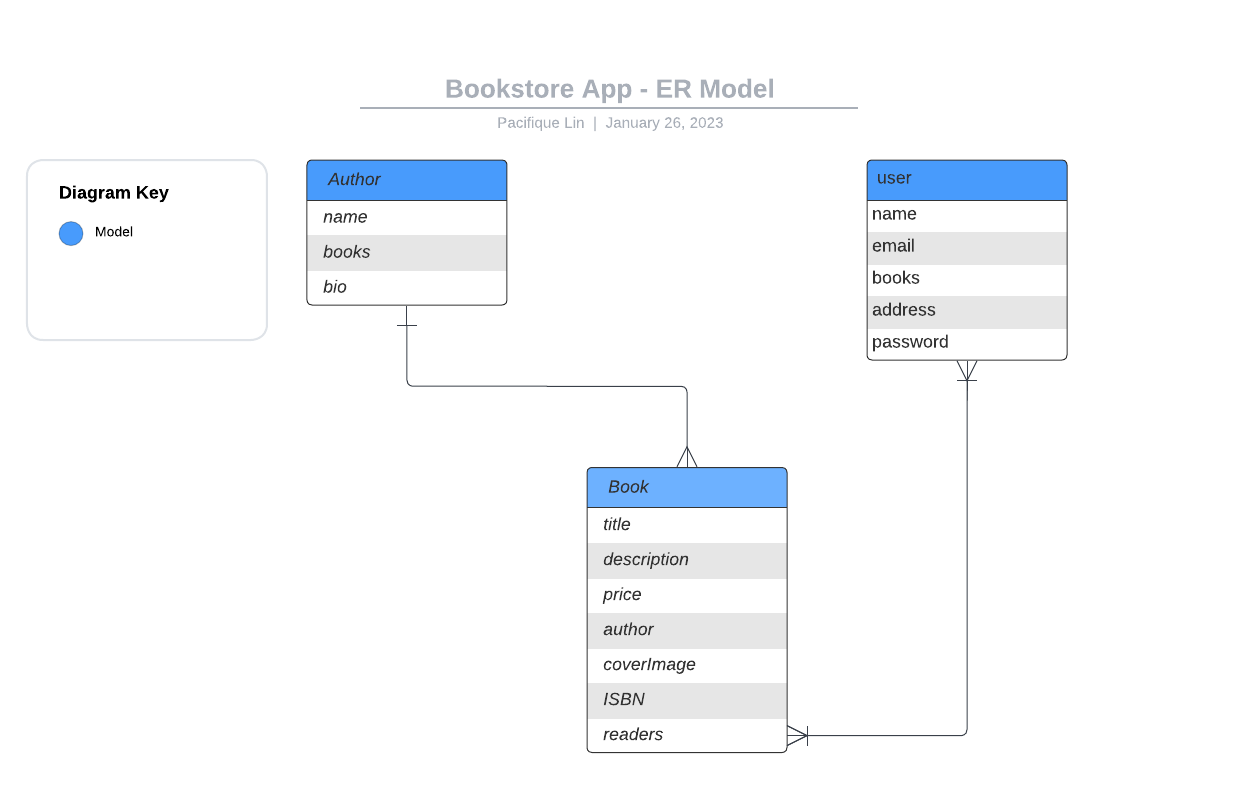
image1 - ER model
As you can see above, we have a simple Entity Relationship(ER) representing our bookstore database. This will be our starting point. These are the entities we have for now:
- Book entity: representing a book, that has a title, a description, a price, an ISBN(International Standard Book Number), and an author, in MongoDB world, the author field will be a reference to pointing to the author model, containing the author’s object id. Read more about ObjectIds in MongoDB here.
- Author entity: representing an author, we need information like name, bio and his books, and an array of references from the book model.
- User entity: representing a customer, this will be the user of the bookstore app, he can create an account and purchase books for now.
Now, let’s set up the project …
Project setup
Before we start coding, please make sure to have node v14 or higher, nest CLI and yarn v.1.22 (our package manager).
You can check it all out now, to make sure you have all installed and running
$ node -v
# => outputs the node version currently installed
$ yarn -v
# => outputs the version of yarn
$ nest info
# => outputs information about the current nest CLI installed and its dependency, make sure the node version matches the version required by your CL
Once you have all the required packages, we can set up the codebase.
We create a new Nest project with the following command
$ nest new bookstoreApp
# choose yarn as a package manager, or the one you feel more comfortable with
The output should look like the screenshot below

image2 - Create a new nest project, the output.
The scaffold created has the below structure
# PROJECT INITIAL STRUCTURE

├─ package.json
├─ src
│  ├─ app.controller.spec.ts
│  ├─ app.controller.ts
│  ├─ app.module.ts
│  ├─ app.service.ts
│  └─ main.ts
├─ test
│  ├─ app.e2e-spec.ts
│  └─ jest-e2e.json
├─ tsconfig.build.json
├─ tsconfig.json
└─ yarn.lock
In the code structure, we can notice that Nest also creates testing files under test/ directory, and the project is essentially written in typescript.
Let’s run the project generated for us, and see what we have:
# use the command below
$ yarn start
Then, go to localhost:3000 and make sure you GET Hello World!
Kudos, you have created a Rest API with Nest, let’s understand the nest architecture in detail now.